
I’ve started working on my new HO scale model railroad, the Neches Valley RR. It’s based on a logging railroad in eastern Texas around the year 1910. My home office is only about 9 feet wide, so I don’t have a lot of room to work with.
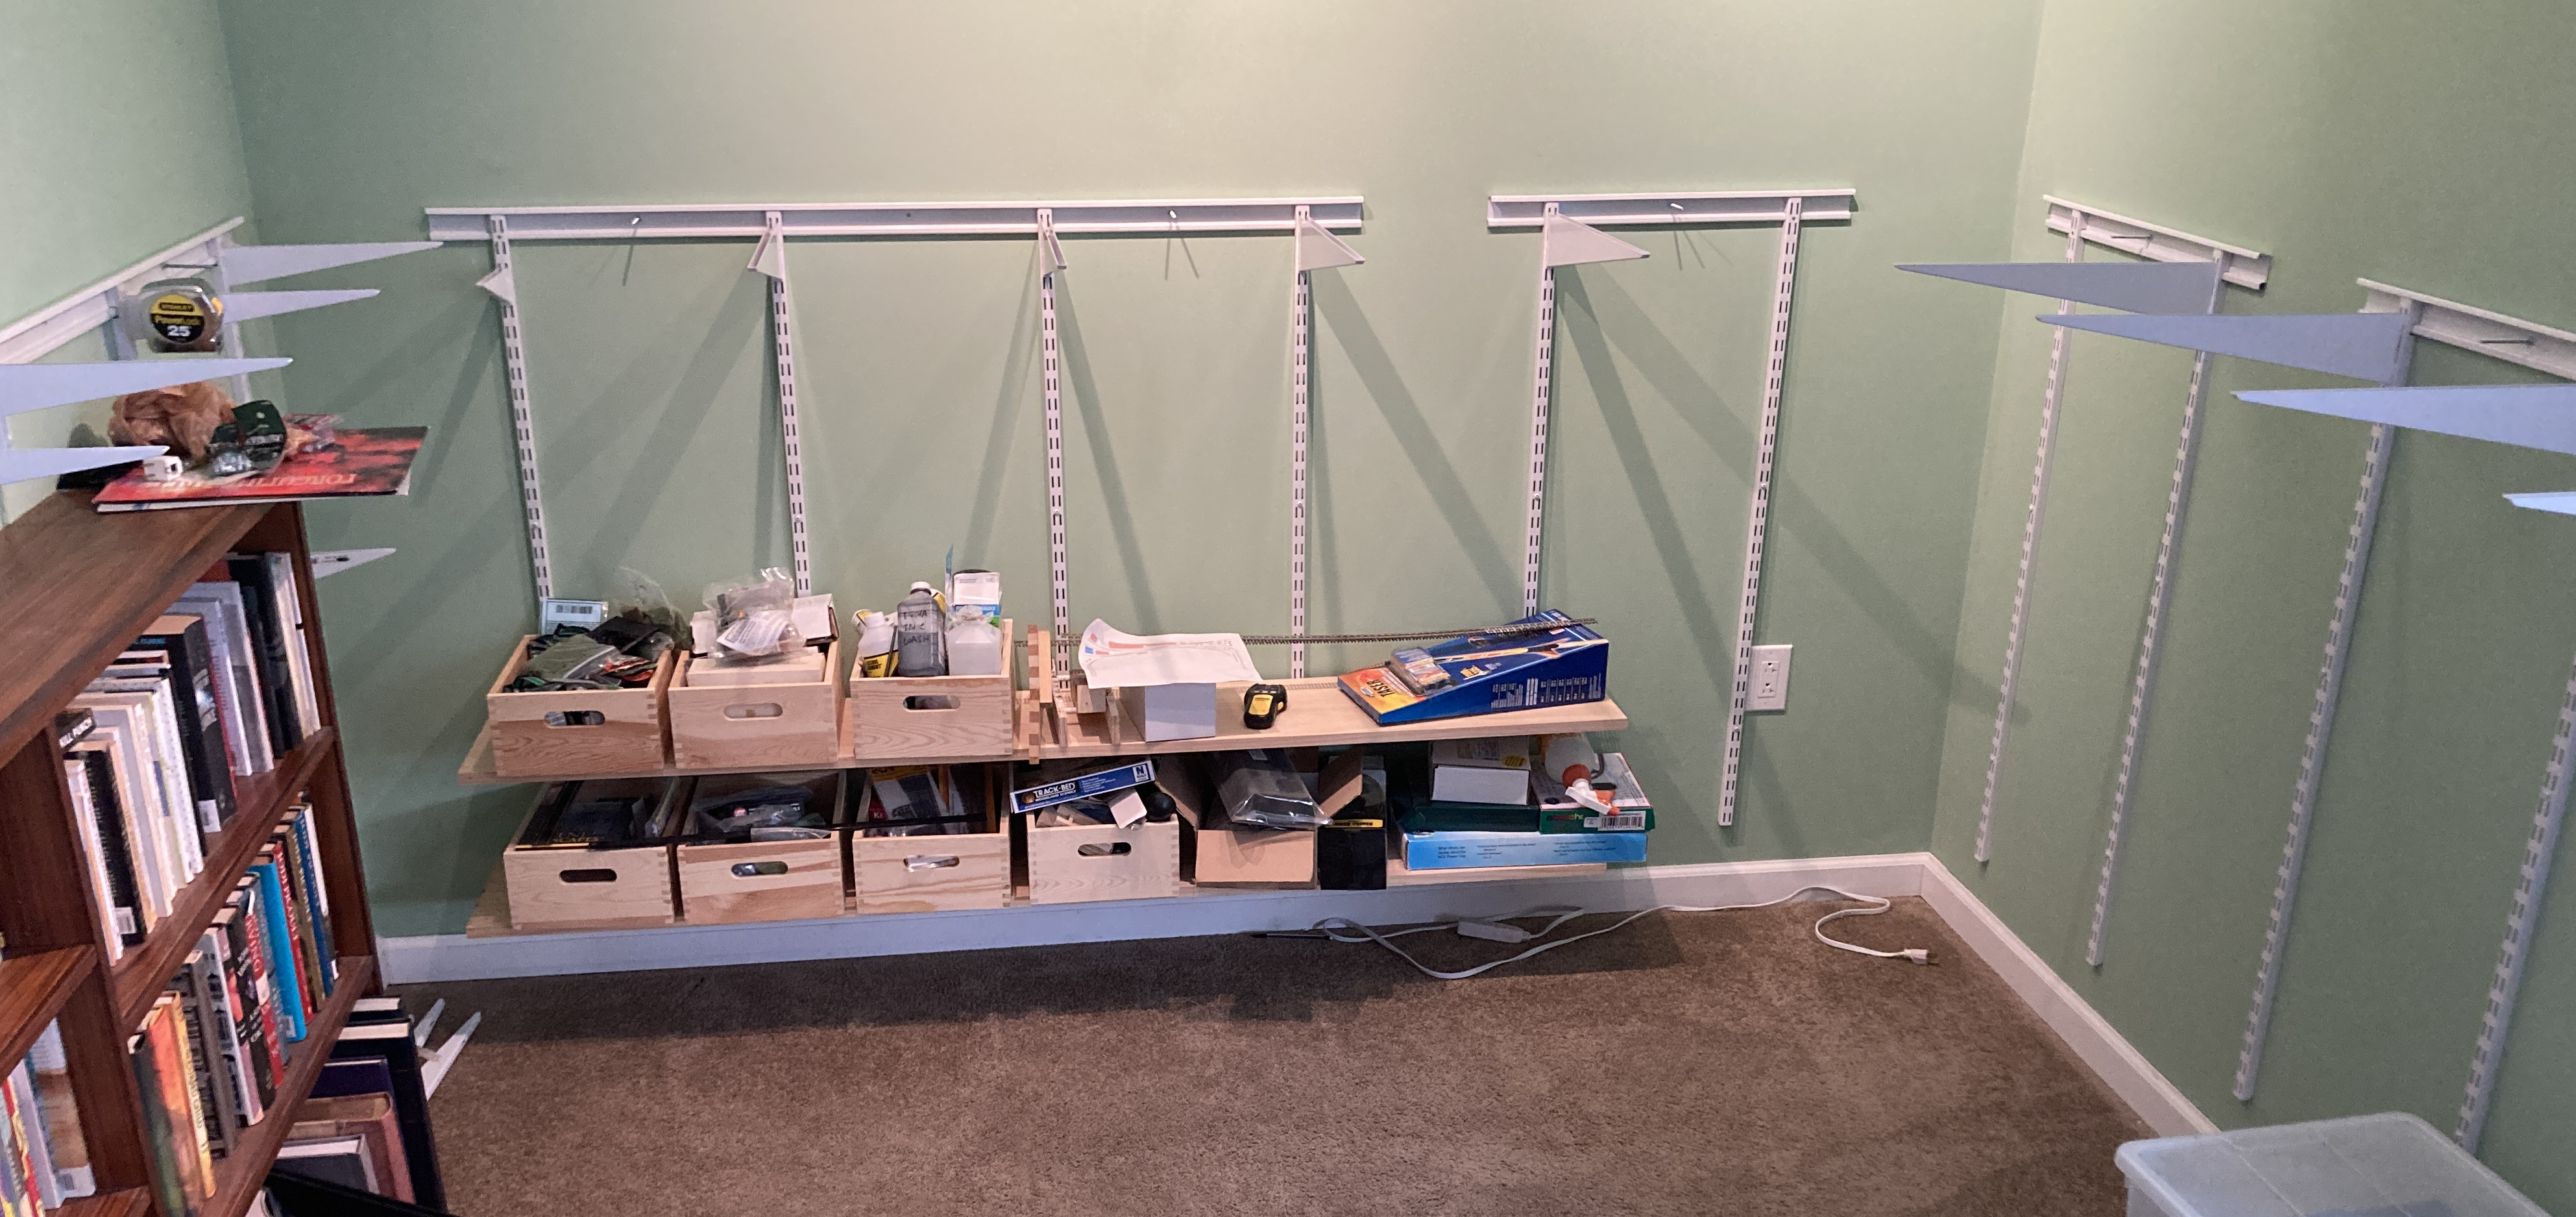
This past weekend I’ve started on the benchwork: the support structure that holds the railroad up. I recently took down the “1.0 layout” that I was using to research the various techniques I’ll be using. That was a single short module mounted on steel shelving brackets attached to the walls. For the “2.0 layout” I’ve decided to go with a similar approach, but since it needs to wrap around three walls I’ve decided to tweak it by using a variant of the shelf hardware that uses a horizontal steel rail at the top. As long as those rails are level and aligned I know the rest of the layout will be relatively square.
The first step was to set a level datum line to act as a reference for every other measurement. One complication is that on the left side the layout will overlap a set of walnut bookshelves I built, so I couldn’t measure that section reliably using just a tape measure. And anyway, the room spans the joint between the older part of the house and the expansion, so I know for certain that the walls and floor are neither level, plumb, nor square. So I picked one corner of the room and made a mark 50″ from the bottom of the baseboard to start with.
Although I looked into the possibility of using a laser level, I couldn’t justify the expense for a single project and wasn’t able to borrow one. My wife and I ended up using a $10 chalk line with a $4 line level to make the marks, and that turned out fine. It is a job that’s much easier with two people, especially since the level has a tendency to go flying when you snap the string.
The “regular duty” hanging track has a screw hole every 8 inches, which makes it easy to align to wall studs on 16-inch centers. Do not try to use drywall anchors, it just won’t be strong enough for the load. I found it easiest to align my chalk mark to the screw holes, instead of the top of the rail channel, so my layout is about an inch higher than I originally planned. I drilled a pilot hole for the first mounting screw, tacked the rail on very loosely, and then marked and drilled the pilots for the other mounting holes. The mounting screws are ordinary #10 x 2″ screws with pan heads.
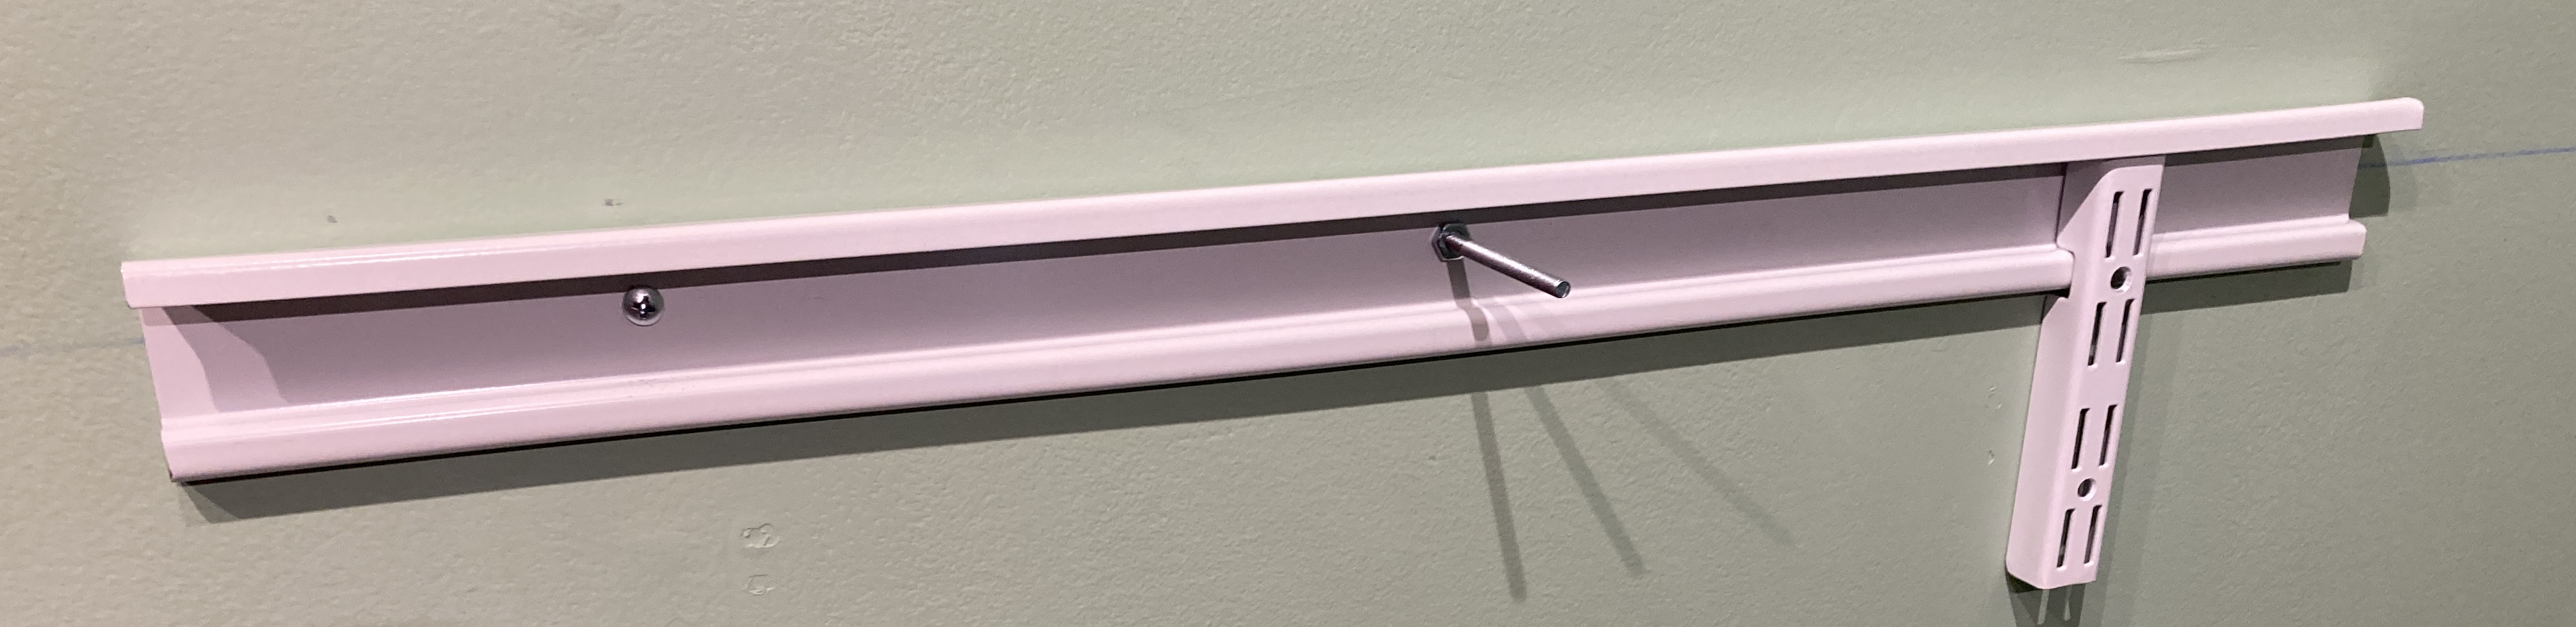
In between the studs, at three spots on each wall I added a #10-32 machine screw, 2-1/2 inches long, turned “backwards” to act as an attachment point for the benchwork boxes. So when I marked the holes for the rail, I also needed to drill a shallow 1/2-inch wide hole for the head of the machine screw so that the rail will lie flat against the wall. The matching #10-32 nuts included with the machine screws are added to finger-tightness just to keep the screws from flopping around. Note that #10 machine screws are commonly sold with either 24 or 32 threads per inch, so whichever you choose make sure to stay consistent throughout the project!
The rails come in 80-inch lengths, but two of the spans are nine feet long. I was able to strategically cut the rails using a hacksaw and a cheap miter box to “stretch” the full length. These rails will be hidden behind the benchwork boxes, so they won’t be visible. Each span should be securely mounted to at least two studs. Make sure to wear eye protection when cutting or working with metal, especially ferrous materials like steel, and remember to remove the sharp burrs with a file.
Next I needed to attach the vertical dual-slot tracks, which will hold the shelving brackets. These come in lengths up to 80 inches and are made of extruded steel channel. If you’ve selected a layout height that allows one of these standard lengths to work for you, then rejoice! Masochist that I am, I needed to customize every single one, starting with three “shorties” to go over the bookcase. With 17 channels to cut (plus a few unexpected “extras”) I found myself wishing for a power chop saw, but the miter saw I have is only appropriate for non-metals. The good news is these cuts didn’t need to be precise, so the hacksaw and miter box worked fine, but I got quite an upper-body workout out of it.
Since these cuts would be visible, I decided to dress them up a bit. It also gave me an excuse to try a new tool — a Dewalt 8″ bench grinder I received last year as a corporate anniversary gift from my employer. Unboxing and assembling the unit took only about half an hour. There are quite a few different sized nuts, bolts, and washers, but the instructions were otherwise pretty clear.
As a hobbyist the 8″ unit is probably over-powered for my needs, and there is a 6″ version that might be a closer match — and apparently shares the same instruction manual. But in my case the price was right.
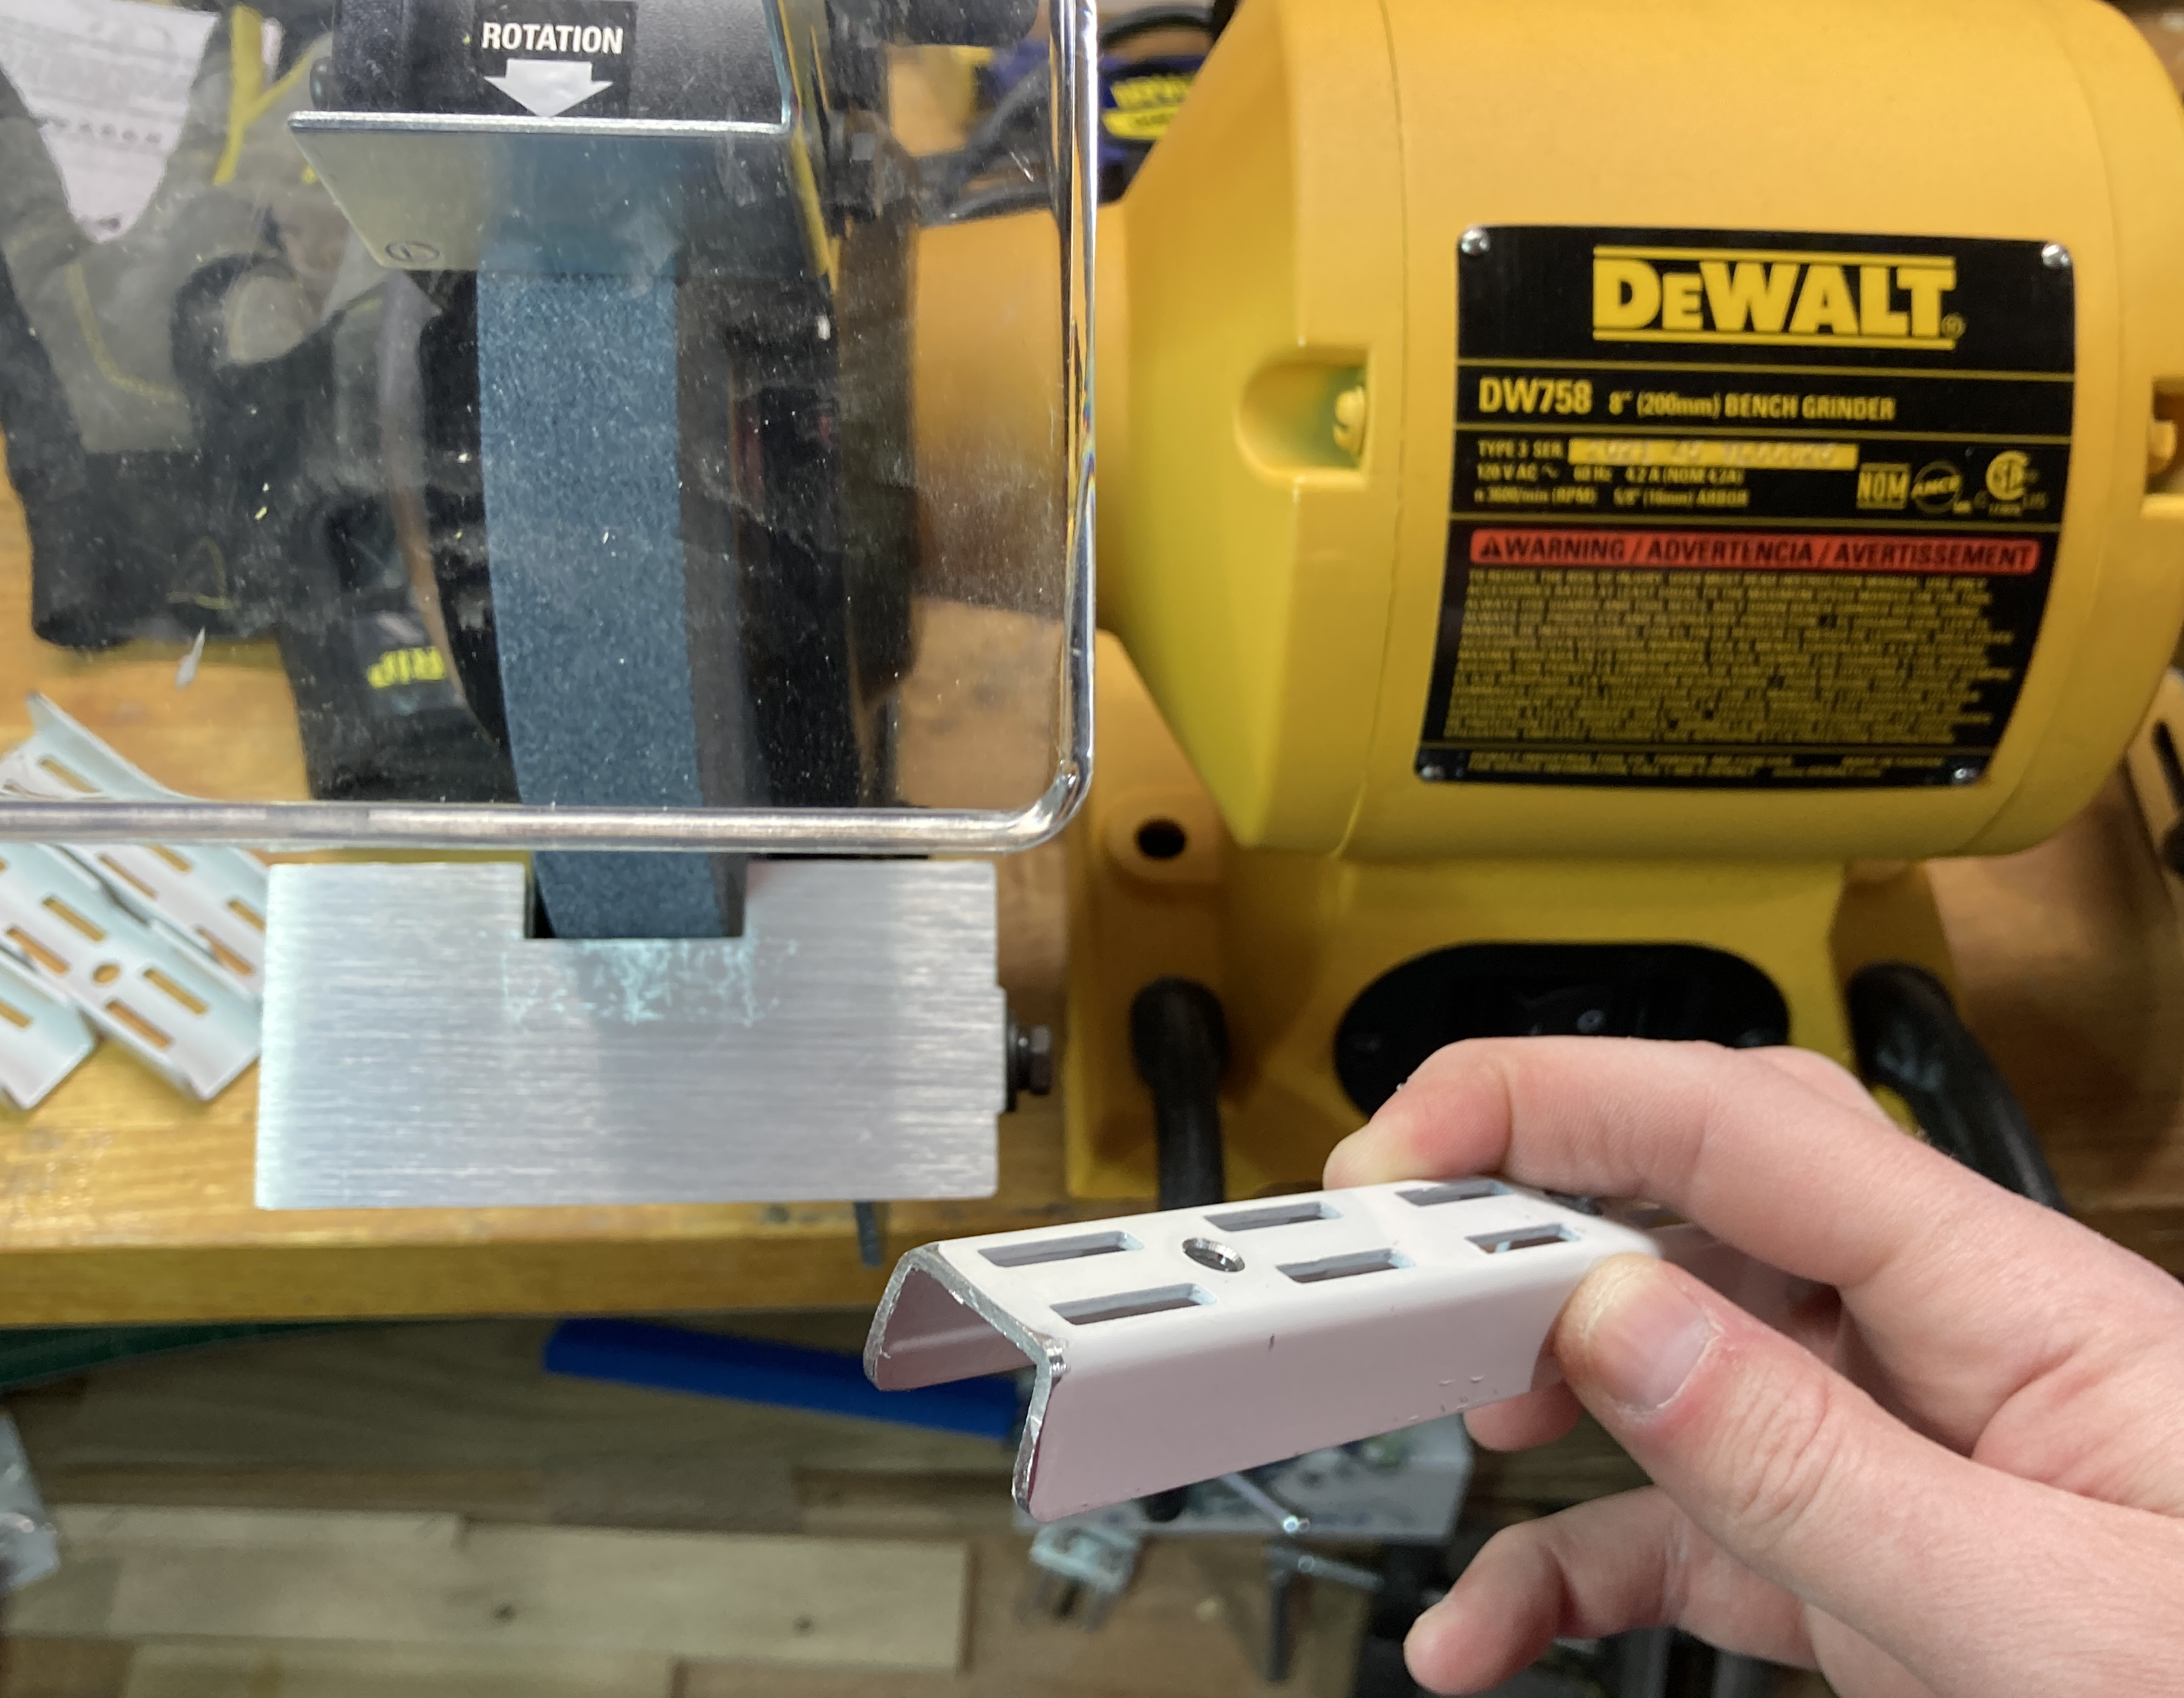
The previous warning to wear eye protection and avoid touching your face afterwards apply very seriously here, as the bench grinder will make lots of sparks and nasty black dust that you want nowhere near any of your orifices, especially if you think you may need an MRI scan any time in the next 100 years. You also need to make sure to securely clamp the grinder down — the instructions recommend mounting it permanently — or as soon as you turn it on the vibrations will make it “walk” around on its rubber feet. I did find, however, that the tool ran a lot more quietly than I would have expected.
First I used the coarse grinding wheel to roughly round the channel on each side, and then the fine wheel to smooth out the curve. Once I finished with the power tool I found that I still needed to manually de-burr each cut, inside and out, with hand files. I followed this up with 80-grit and then 120-grit sandpaper for a smoother finish. Finally, I took each piece outside and gave the cut end a couple of quick coats with Rust-Oleum Appliance Epoxy spray, which matches pretty closely to the original glossy white coating.
The epoxy spray may still be tacky after 6 hours, so it should cure at room temperature overnight. Once dry, I hung them from the horizontal rails and secured them into the studs using some white-painted #8 screws I sourced from the Amazon marketplace. I tried to keep the spacing between each channel to exactly 16″ in order to make the math easier when I build the boxes, but I know that on the right side I’ll need to measure more carefully because of some unevenness in the underlying studs. You may also find that you need to adjust slightly to clear an electrical outlet, which per building code are mounted on the side of a stud.
The brackets are made of folded steel. The Everbilt (Home Depot) brackets are shaped with notches for wire shelving, but the Rubbermaid twin-track brackets across the aisle have a flat top and will work with the Everbilt channels. They come in a variety of lengths from 6-1/2 to 18-1/2 inches. You’ll want the brackets long enough to fully support the layout’s center of gravity, which should be the midpoint of the box, give or take some weight for scenery. The widest part of my shelf layout will be 24″ deep, so for that part I went with the 18.5″ brackets.
This part should be easy, just drop the brackets into place, right? Unfortunately the downside of mixing brands is that the Rubbermaid brackets weren’t designed with the horizontal hanging track in mind, so if you try to put the bracket into the top-most slot — for the layout itself — the tab will run into the rail behind it.
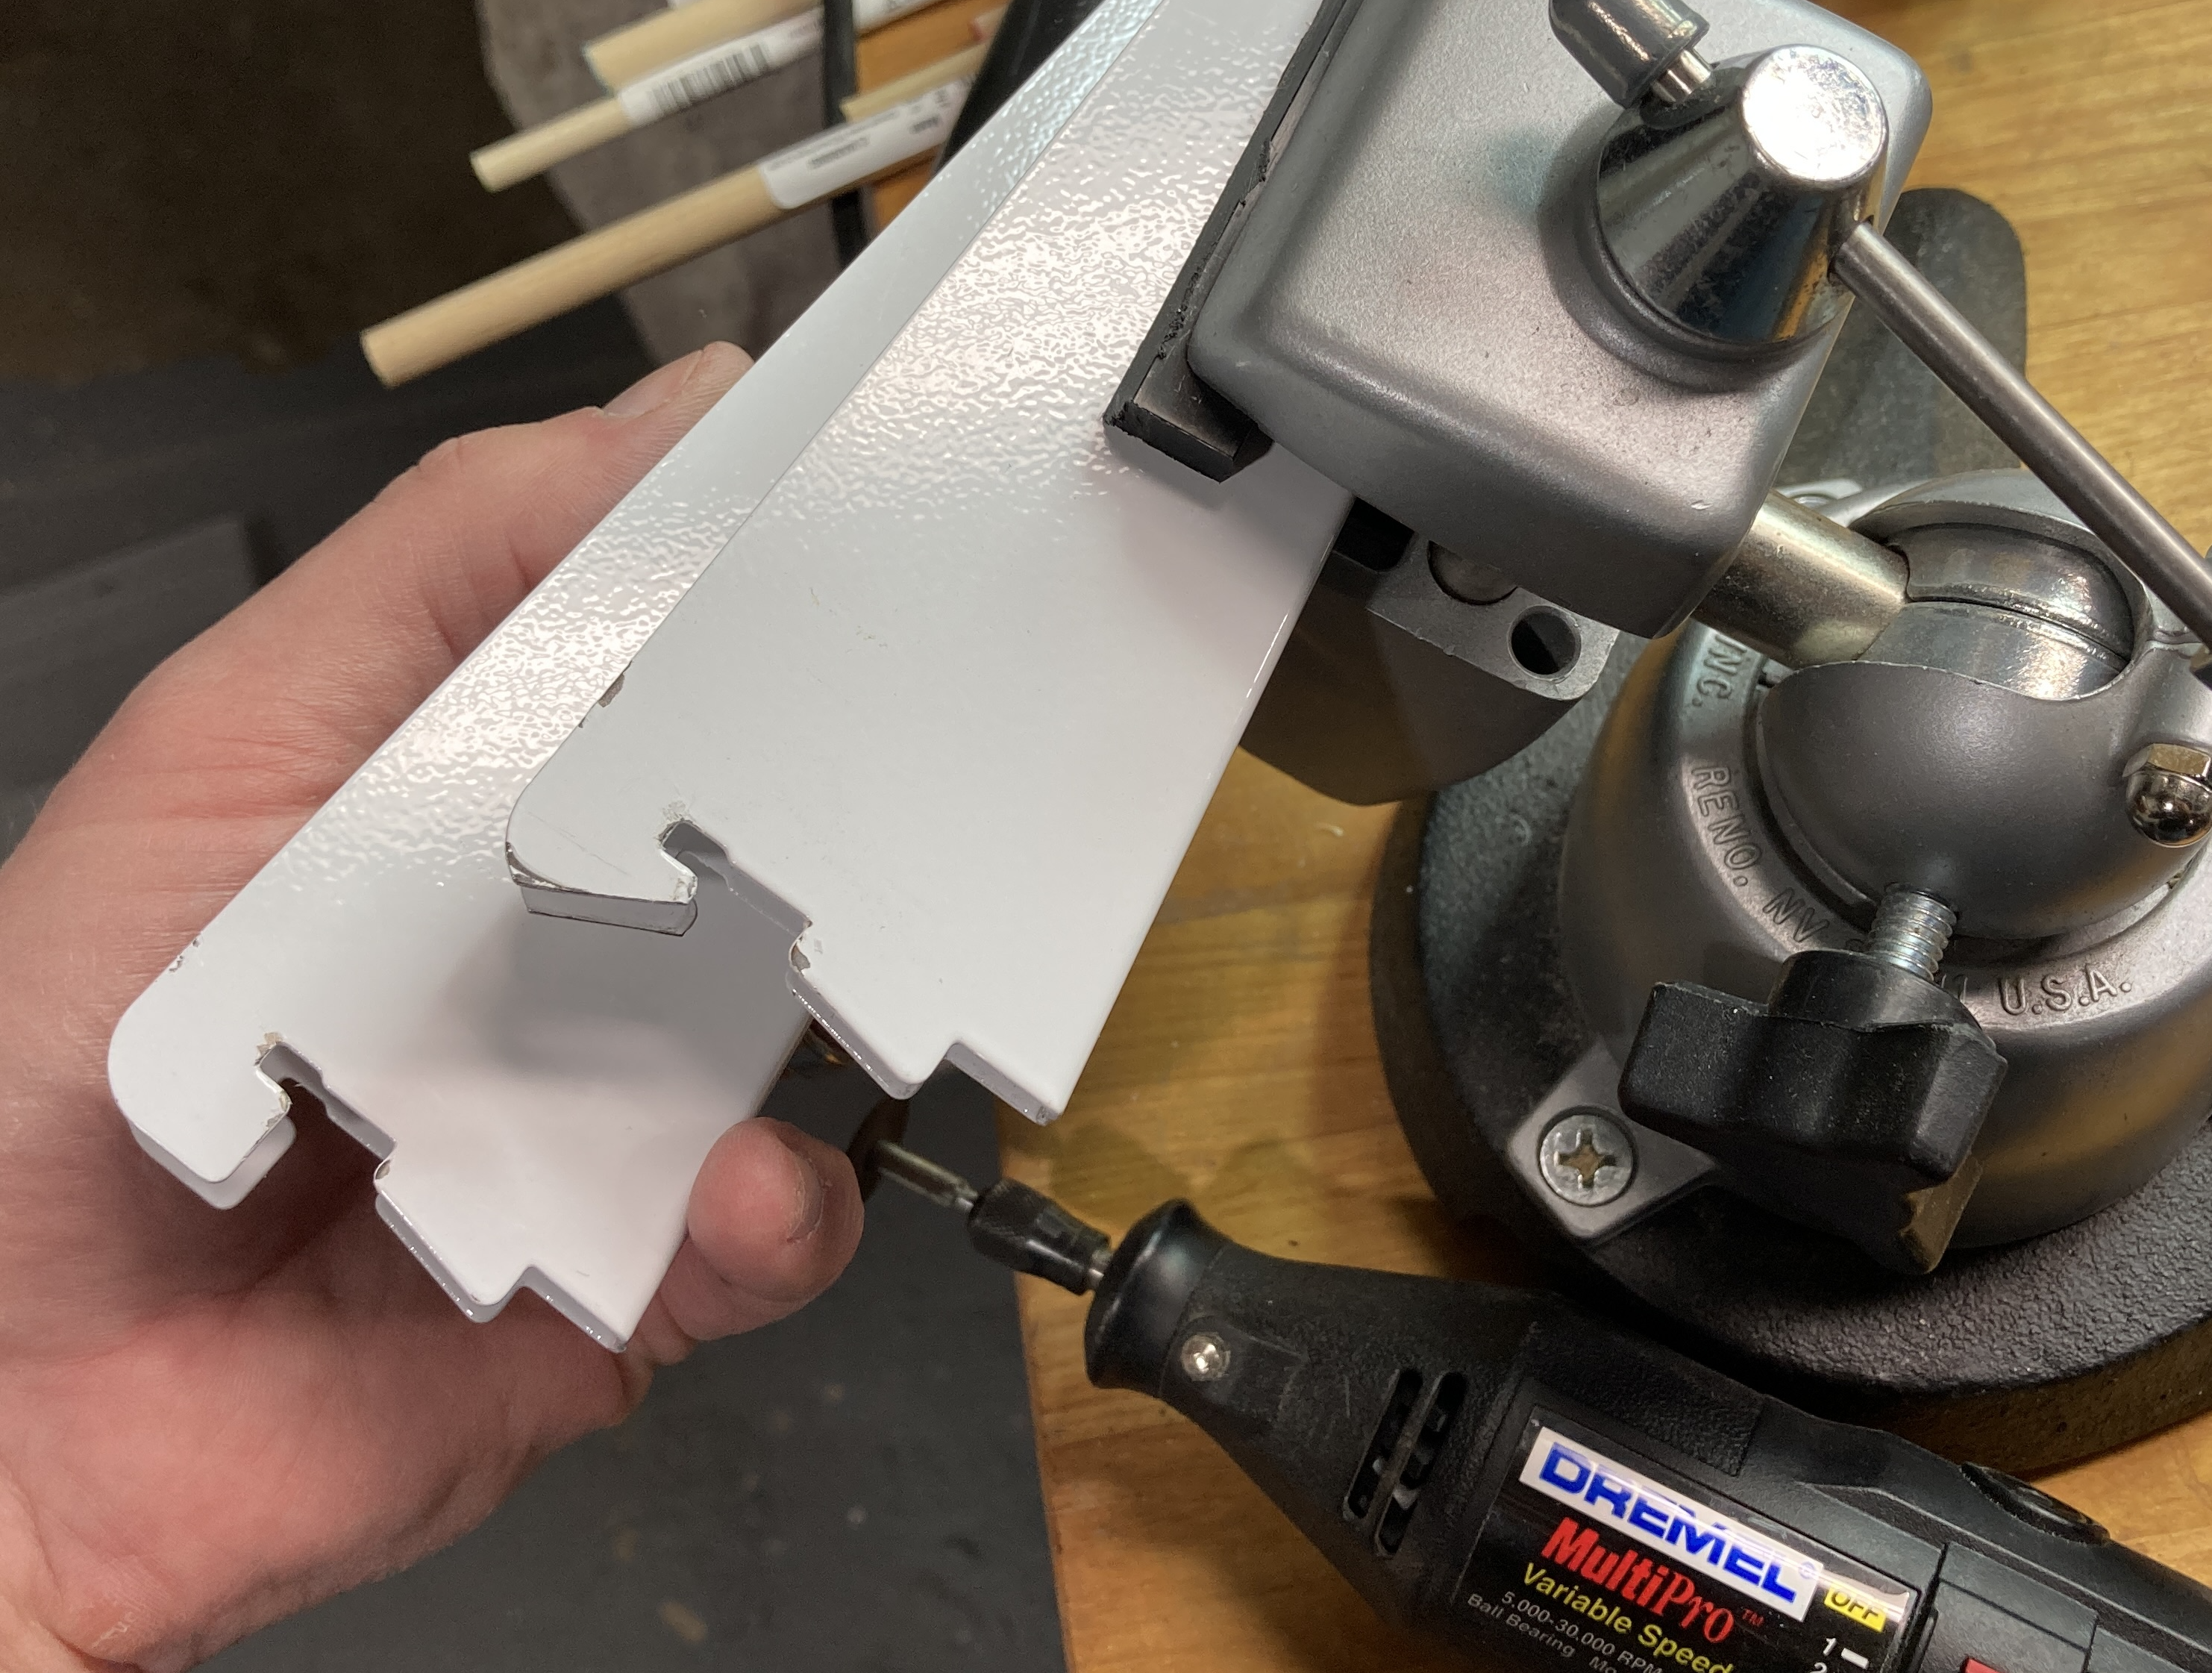
Each of the brackets on the top tier had to be modified. A Dremel tool with a ceramic cutoff wheel was able to trim a bit of steel off each hooking tab. I’m not a structural engineer but I don’t think it compromised the load of the bracket, as the center of stress would still require tearing the steel at the “hook”. Once again, wear eye protection and clean up the cut edge with a file afterwards. The cutoff wheels are ablative so I went through about ten of them to cut 17 brackets.
By the end of the weekend I have the walls covered with enough steel to hold the house together in a tornado. (OK, probably not.)
I went with the modular brackets because I wanted the layout to be cantilevered from the walls without requiring legs. The horizontal hanging track ensures everything is level while providing lateral support. The rail and vertical tracks are both securely attached to the house. The boxes will rest on the brackets and transfer the load compressively to the house via the tracks and rail, and they will be pulled snug against the rail and wall using the machine screw attachment points. That should be enough strength to hold not only the weight of the wood and foam and plastic, but my own weight if I trip over the cat and land on it. 🙂
The design also provides shelving storage that I can customize or change pretty easily. For now a couple of poplar planks gets my various materials back off the floor. I’ll eventually replace those with something prettier and more permanent, right before I hide them completely with skirting.
The next step will be to build the benchwork boxes for the layout itself using plywood sheet and strips.
Product links above may earn me a commission.
I came up with a silly idea for a 3D printing project. My wife and I use an electric toothbrush with interchangeable heads. And whenever we aren’t using it, we generally just leave the head on the floor of the medicine cabinet, which is kind of messy and unsanitary.
I figured I could create a simple toothbrush holder using SketchUp, and print it out on the RepRap at NextFab. For the most part it worked.
The only snag I encountered was that I must have set up my SketchUp file to be in inches and exported it to STL, and the Slic3r gcode generator assumed that I was using millimeters. So when I first tried to print, instead of getting something 2.5″ long, the machine just put a single dot in the middle of the plate and cheerfully informed me it was finished. I was able to fix it by scaling it by 2,540%.
Below are pictures of the final product.

Fresh off the printer

Completed and installed.
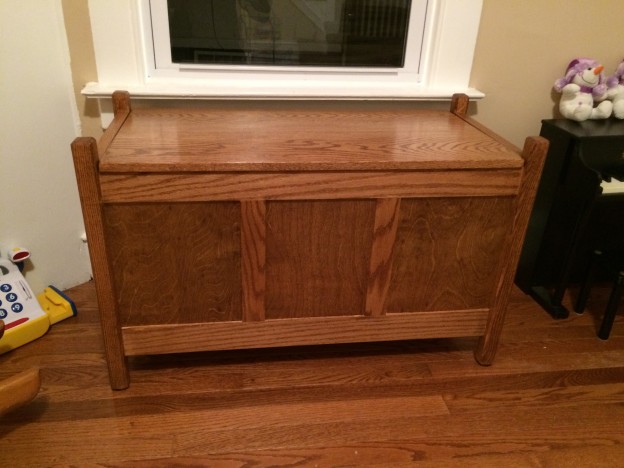
For the past couple of months, we’ve been working on two changes to the front room. The first was to ship my childhood piano up from my parents’ house in North Carolina. And the second was to build the storage bench pictured above.
I built this bench from scratch based on plans in Furniture You Can Build: Projects That Hone Your Skills by Joe Hurst-Wajszczuk. His version of the bench can be seen in the lower center of the book’s cover.
The bench is made of red oak from Spacht Sawmill, including some quarter/rift-sawn oak for the legs. Most of the construction was done at NextFab. This was my first furniture project, so not everything went according to plan. In fact, it turned out the book contained more than a few typos, for example, telling me to cut some pieces 33″ long in order to make a 34″ assembly. That doesn’t work out so well! And then there was the issue with the #4 “brass” (really zinc) screws that just disintegrated under hand-torquing, even with a pilot hole.
But I’m proud of the finished product, and now we’ll have somewhere to sit and remove our boots when we come in from the snow outside.
More construction photos after the cut.
My wife and I have been talking about putting up a photo collage in the upstairs hallway of our new house, but we haven’t had time to work on it yet. I decided to help us get it started, as part of a Christmas gift this year.
My daughter and I made a trip to IKEA and picked up a few VIRSERUM picture frames in off-white, for $3-$5 each. I would have preferred pure white, but it should look fine in a hallway that’s currently painted tan. The important thing is that these frames have a wide, flat frame.
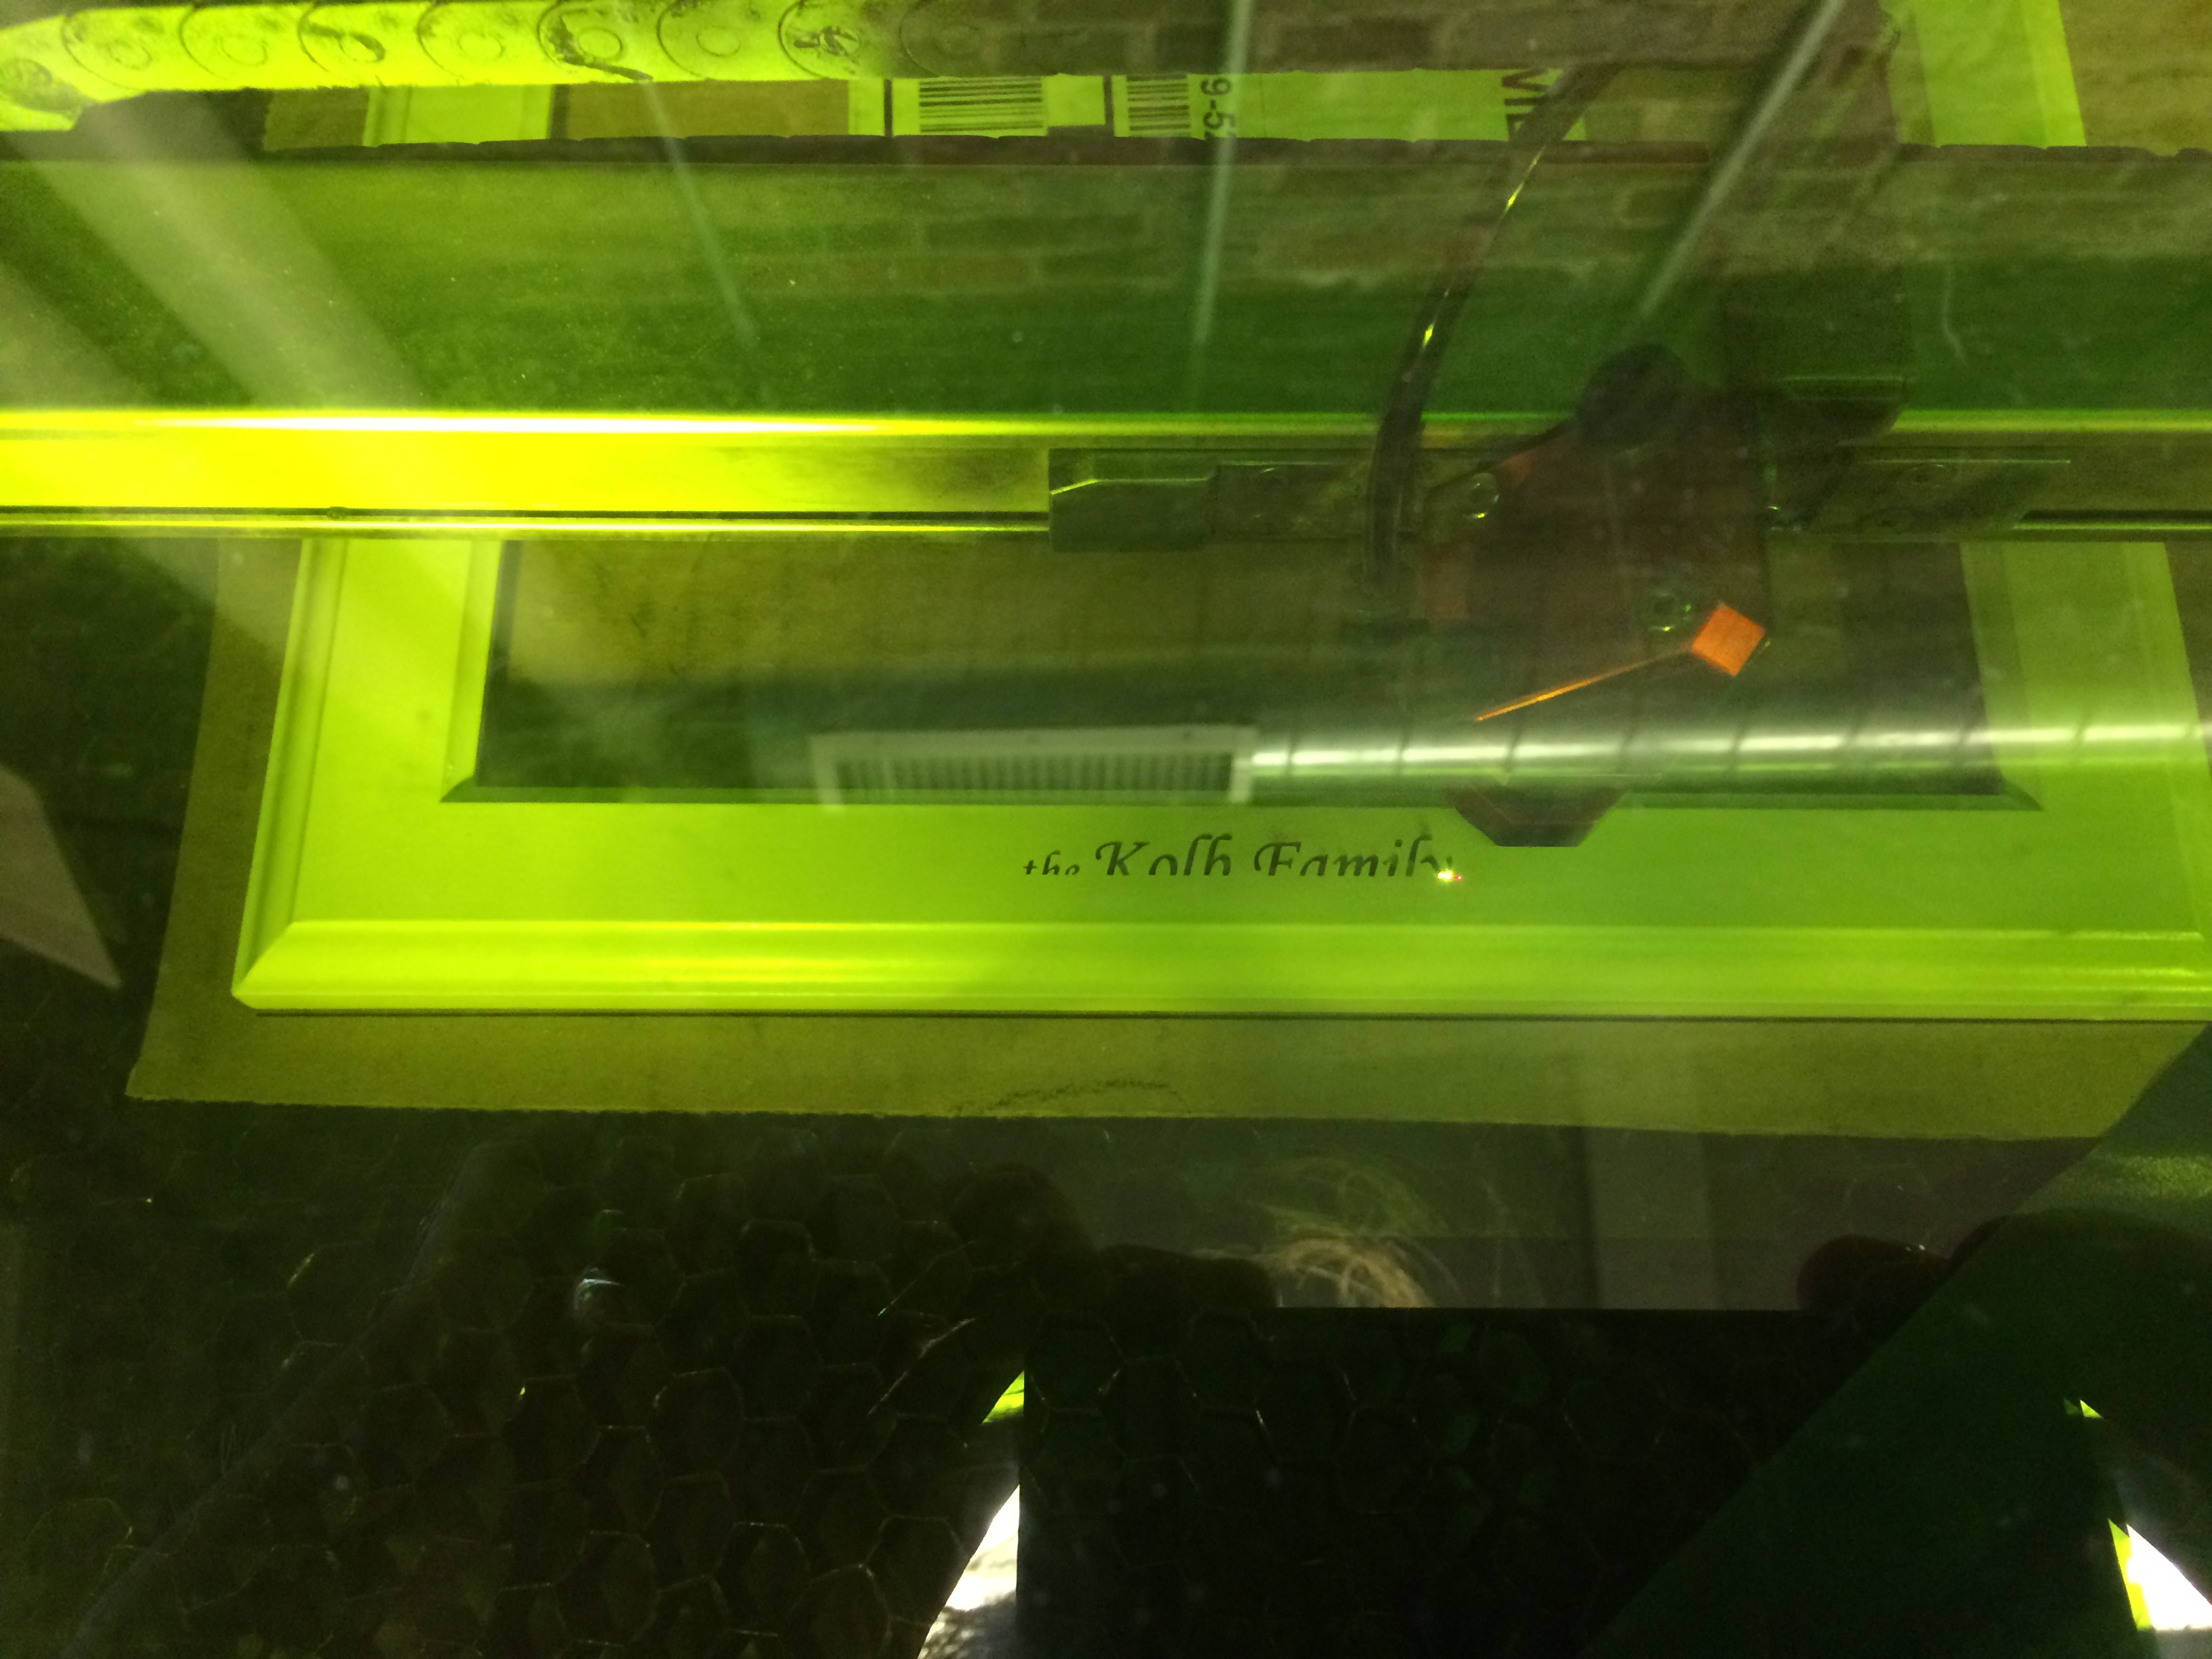
I then took the frames to the laser room at NextFab for custom engraving. I’m no Adobe Illustrator expert, so I had to play around with it a little before I was able to export a file usable by the Trotec 300. I also had to cut an alignment jig using corrugated cardboard, which took up a lot of time for something that ended up discarded.
Here’s a shot of the larger one mid-burn.
And a photo of one of the smaller ones, completed.
This is my new personal website. There’s not a lot to it yet, but hopefully that will change.
Hopefully I can use this space to talk about things that I don’t mind sharing with the world. Expect to see posts about coding, aviation, home improvement, wood working, model trains, and other geeky subjects.